Setup Guide
Step-by-step instructions for connecting UniFi to Pult Presence.
You need to create a local user on your UniFi controller, expose the API to the internet securely, and enter the credentials into the Pult Dashboard.
Credentials you'll collect along the way:
| Credential | Source |
|---|---|
| Controller URL | Your public IP + port (e.g., https://203.0.113.5:8443) |
| Root Certificate | (Optional) Self-signed TLS certificate from the UniFi controller |
| Username | Local read-only user created on the UniFi controller |
| Password | Password for the local user |
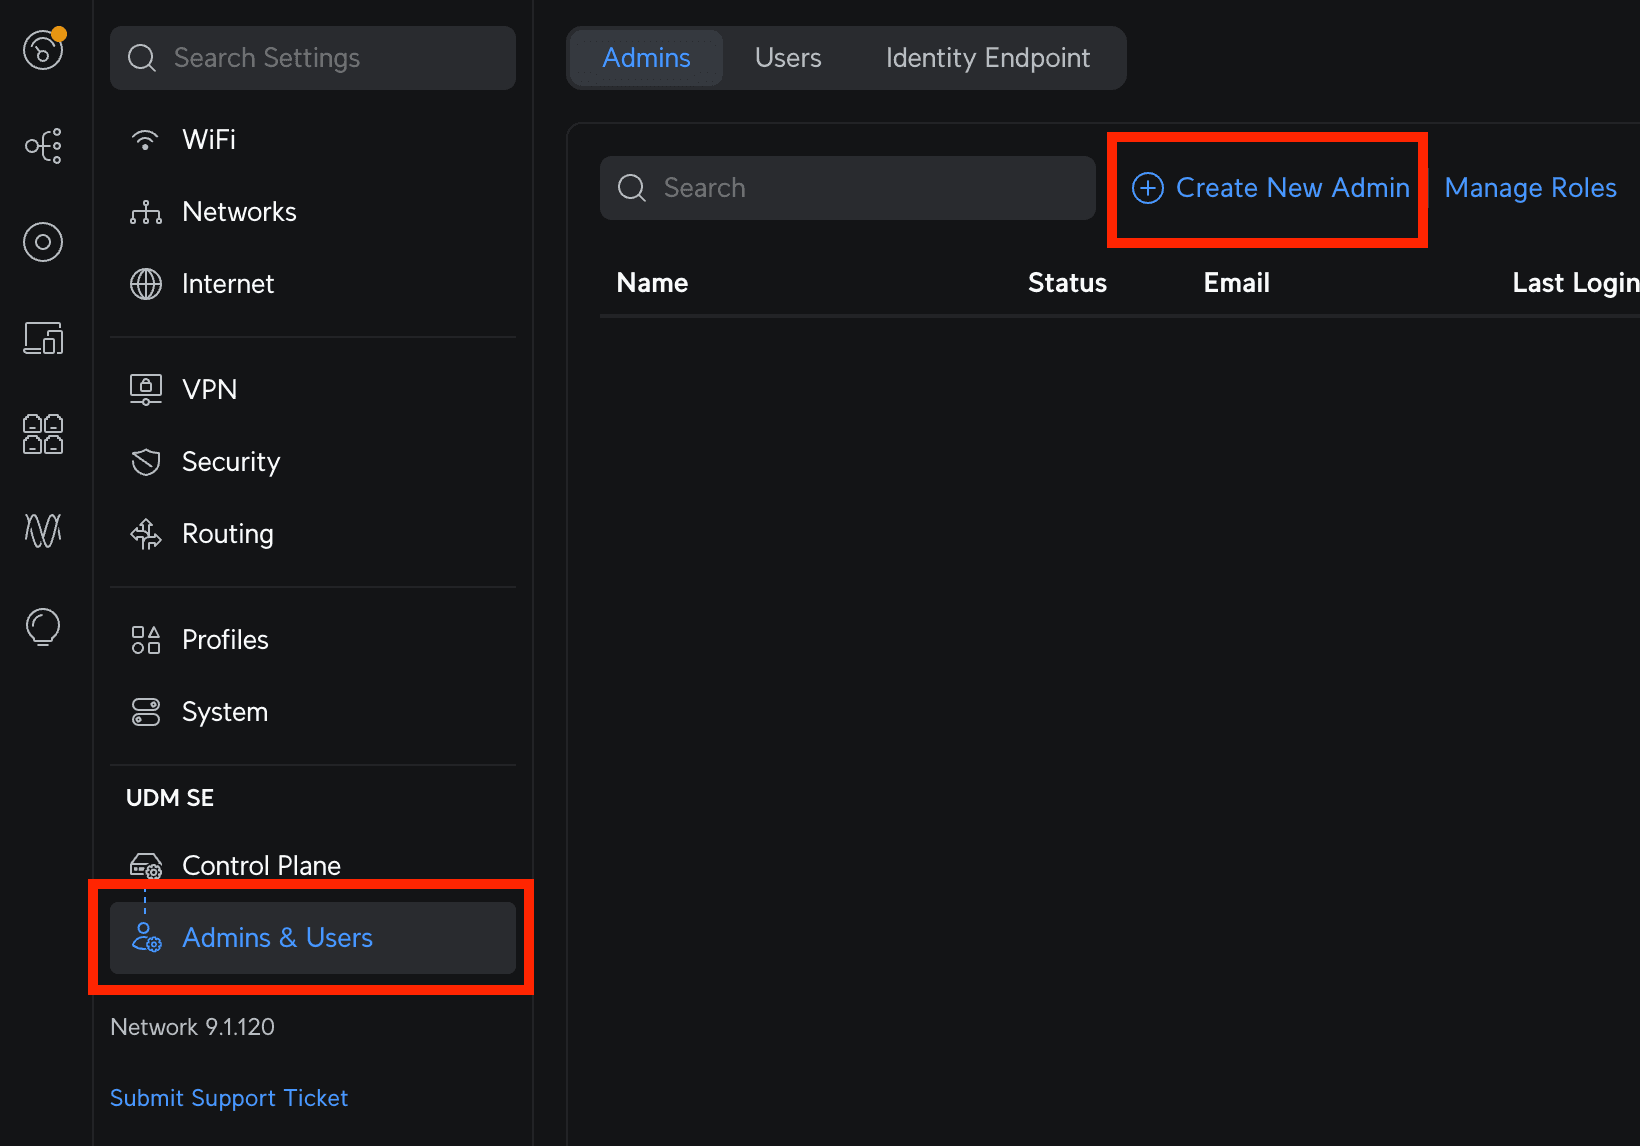
Step 1: Create a Local Read-Only User
- Log in to your UniFi Controller through the local network (e.g.,
https://10.0.0.1). Prefer local access over the UniFi Cloud portal. - Navigate to Settings → Admin & Users.
- Click Create New Admin.
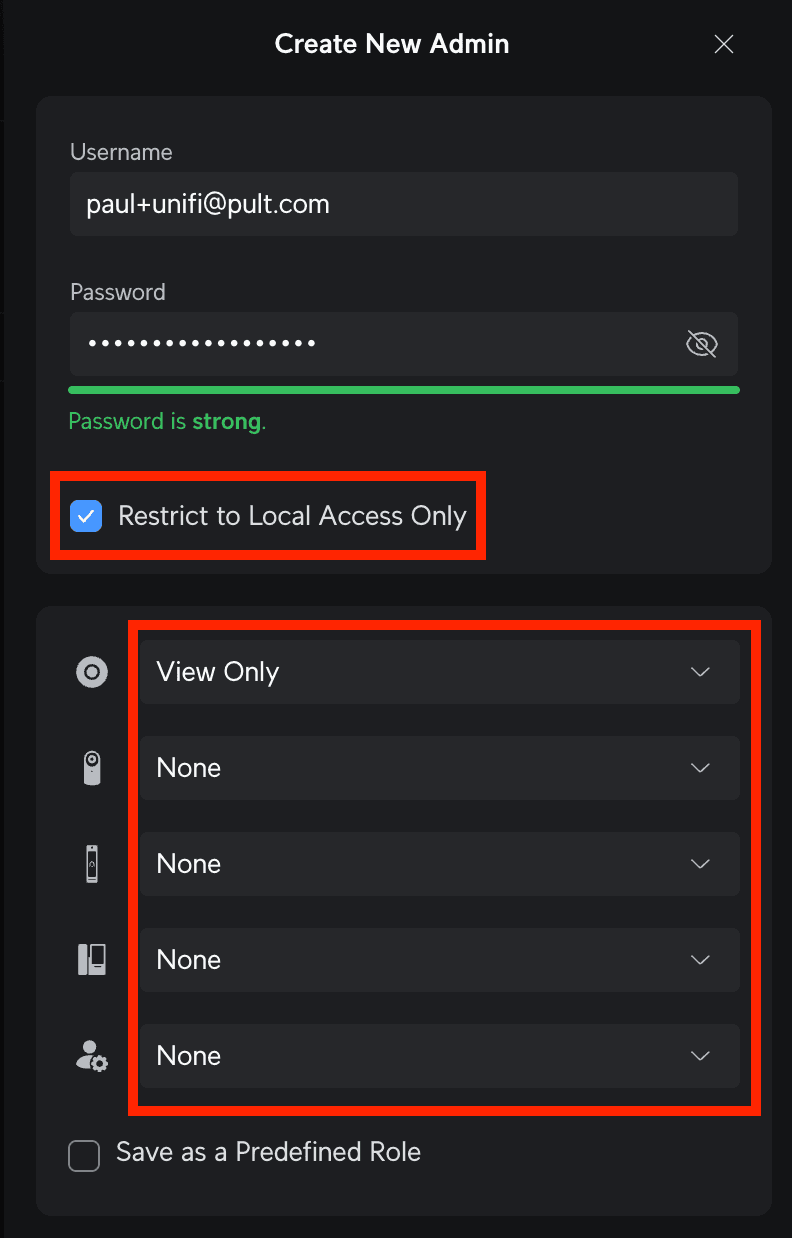
- Enable Restrict to Local Access Only.
- Set a custom username and a secure password.
- Assign read-only role permissions.
- Click Create.
Using a local account avoids potential issues with multi-factor authentication (MFA) requirements on cloud accounts.
Step 2: Expose the UniFi API
Pult needs to reach the UniFi controller API over the internet. Set up port forwarding and firewall rules to allow this securely.
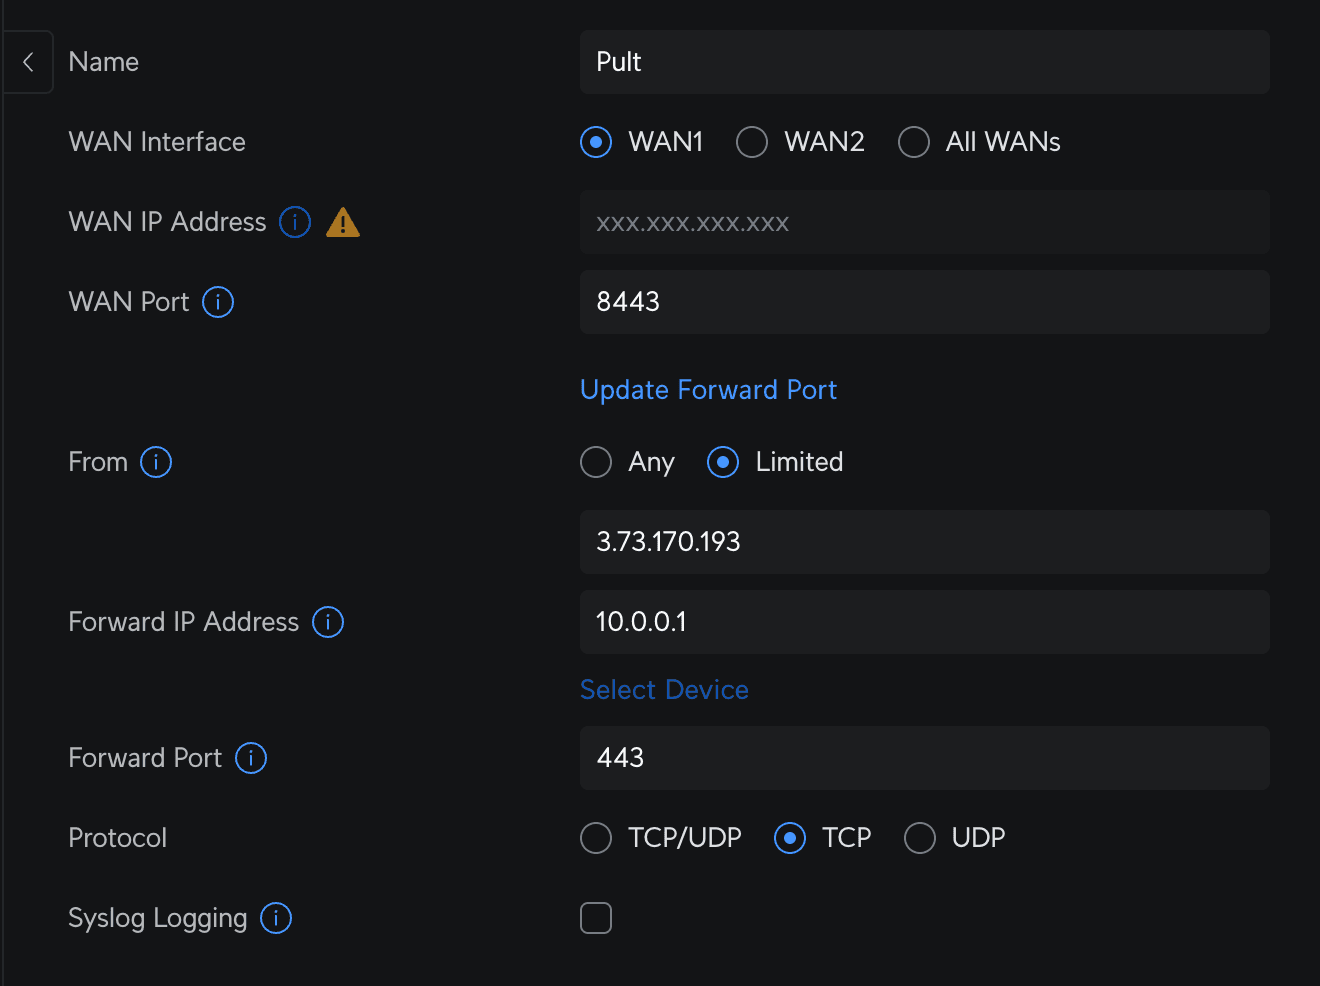
Port Forwarding
- In your UniFi Controller, navigate to Settings → Routing → Port Forwarding (or Policy Engine → Port Forwarding).
- Create a new port forwarding rule:
| Setting | Value |
|---|---|
| Name | Pult |
| WAN Interface | Your internet-facing interface with the static public IP |
| WAN Port | 8443 |
| From | Limited to 3.73.170.193 (Pult's IP address) |
| Forward IP | Your UniFi controller's internal IP (e.g., 10.0.0.1) |
| Forward Port | 443 |
| Protocol | TCP |
Firewall Rule
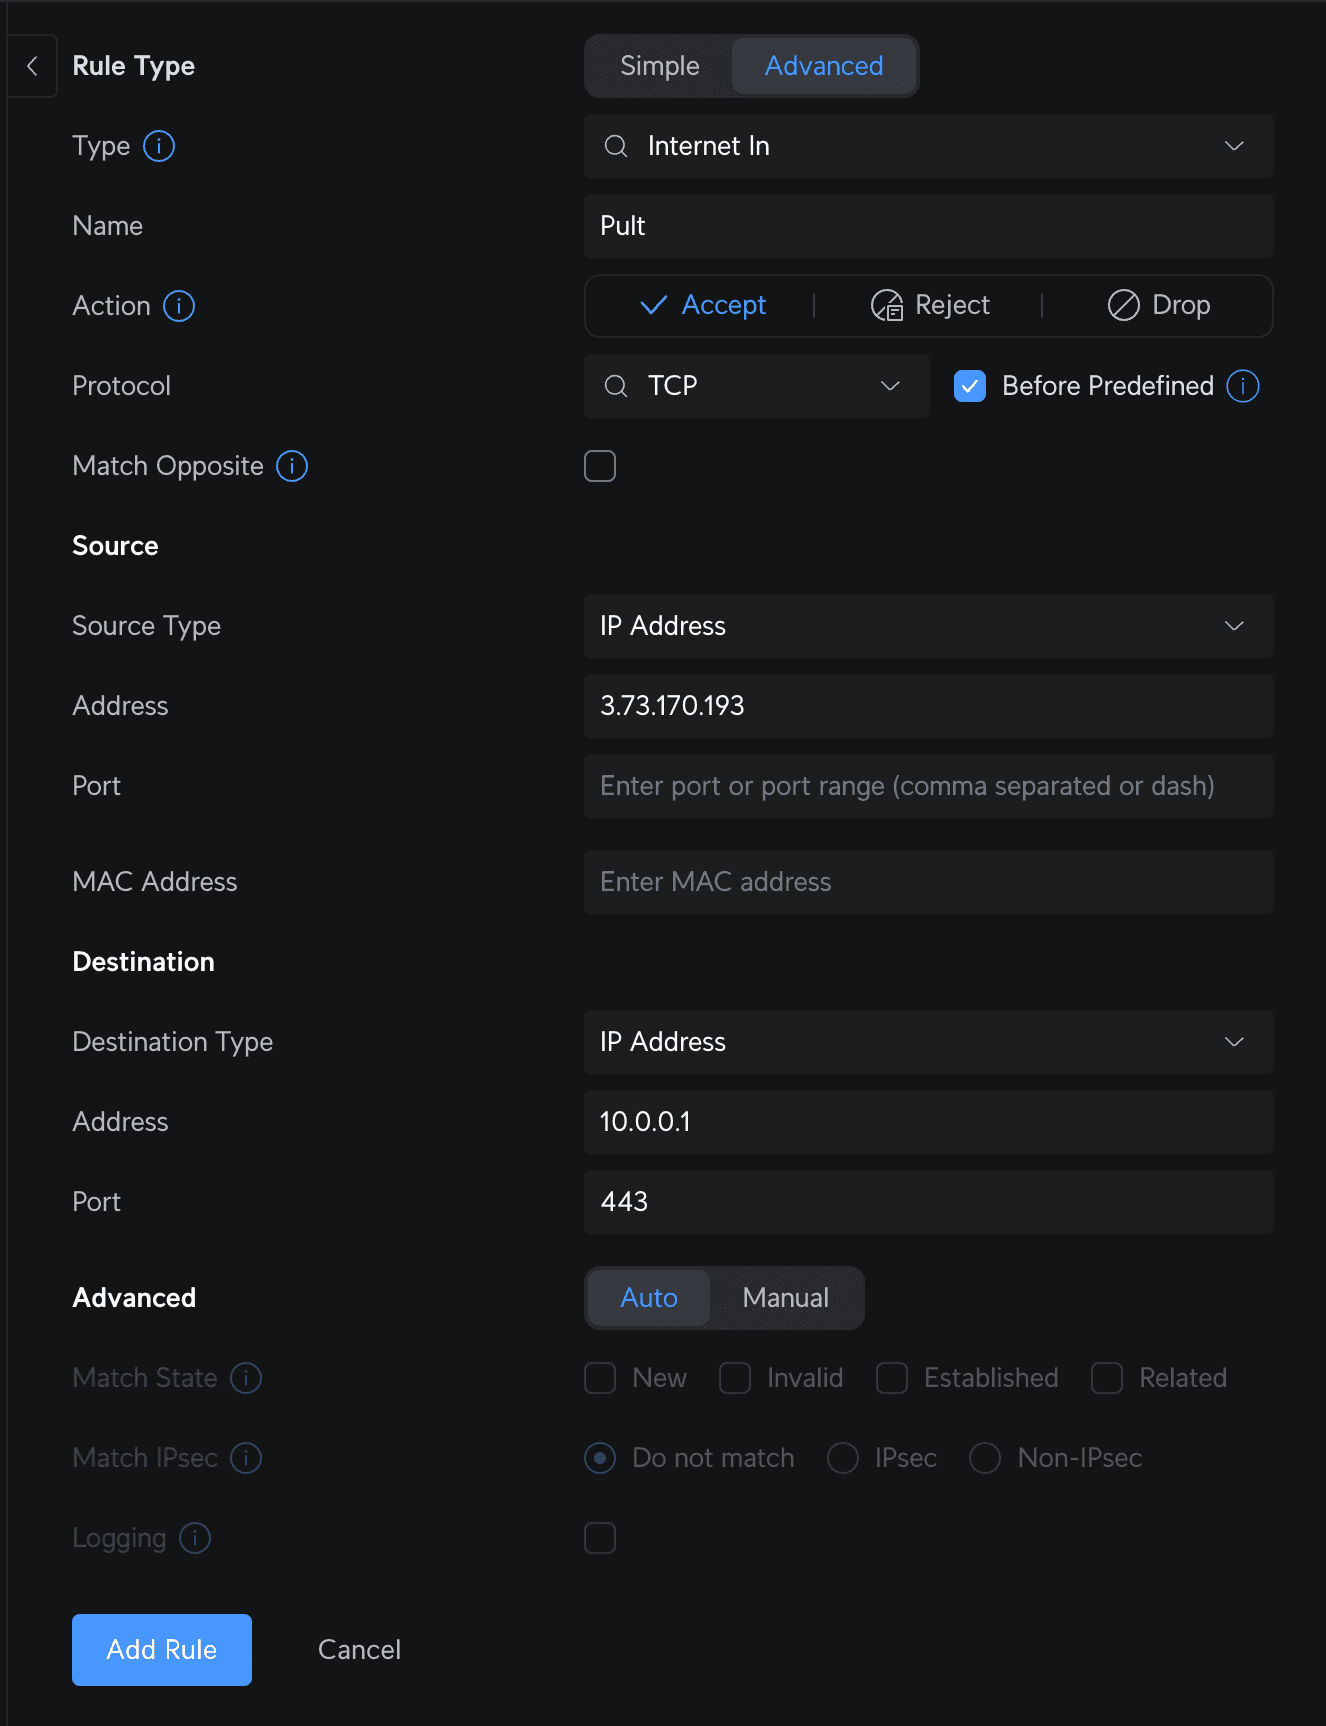
- Navigate to Policy Engine → Traffic & Firewall Rules.
- Create a new firewall rule:
| Setting | Value |
|---|---|
| Rule Type | Advanced |
| Type | Internet Local |
| Name | Pult |
| Action | Accept |
| Protocol | TCP |
| Source Type | IP Address |
| Source Address | 3.73.170.193 |
| Destination Type | IP Address |
| Destination Address | Your UniFi controller's internal IP (e.g., 10.0.0.1) |
| Destination Port | 443 |
If your UniFi Gateway is behind another router (double NAT), ensure port forwarding is configured on both devices, or set the upstream router to bridge mode.
Verify (Optional)
You can verify the configuration by accessing https://<your-public-ip>:8443 from outside your
network. You should see the UniFi login page (with a self-signed certificate warning).
Step 3: Export the TLS Certificate (Optional)
Most UniFi controllers use a self-signed TLS certificate. While optional, providing this certificate to Pult improves connection security.
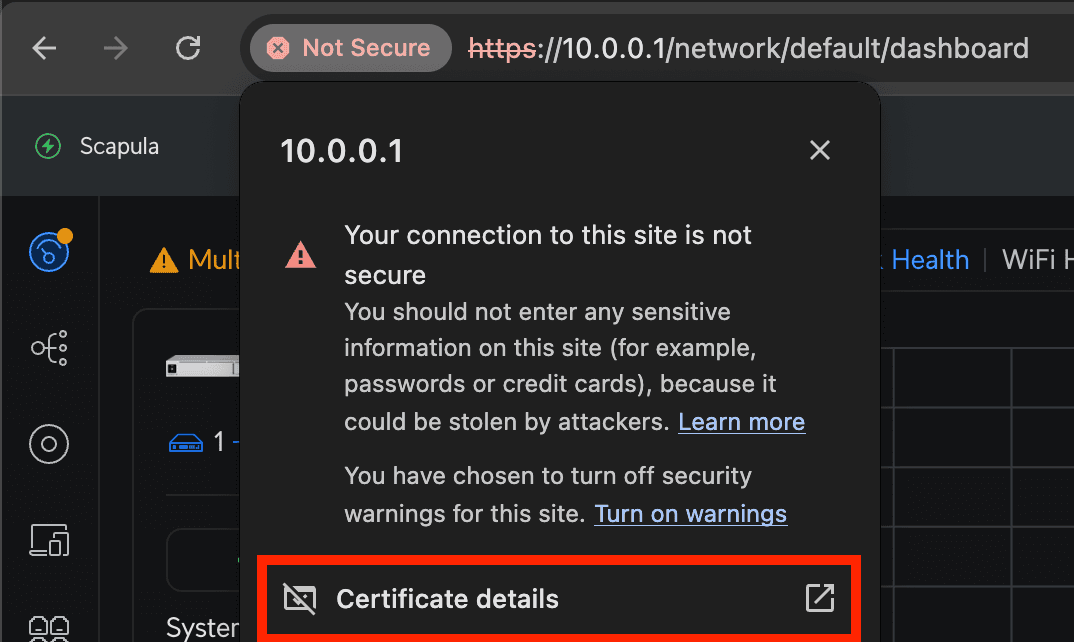
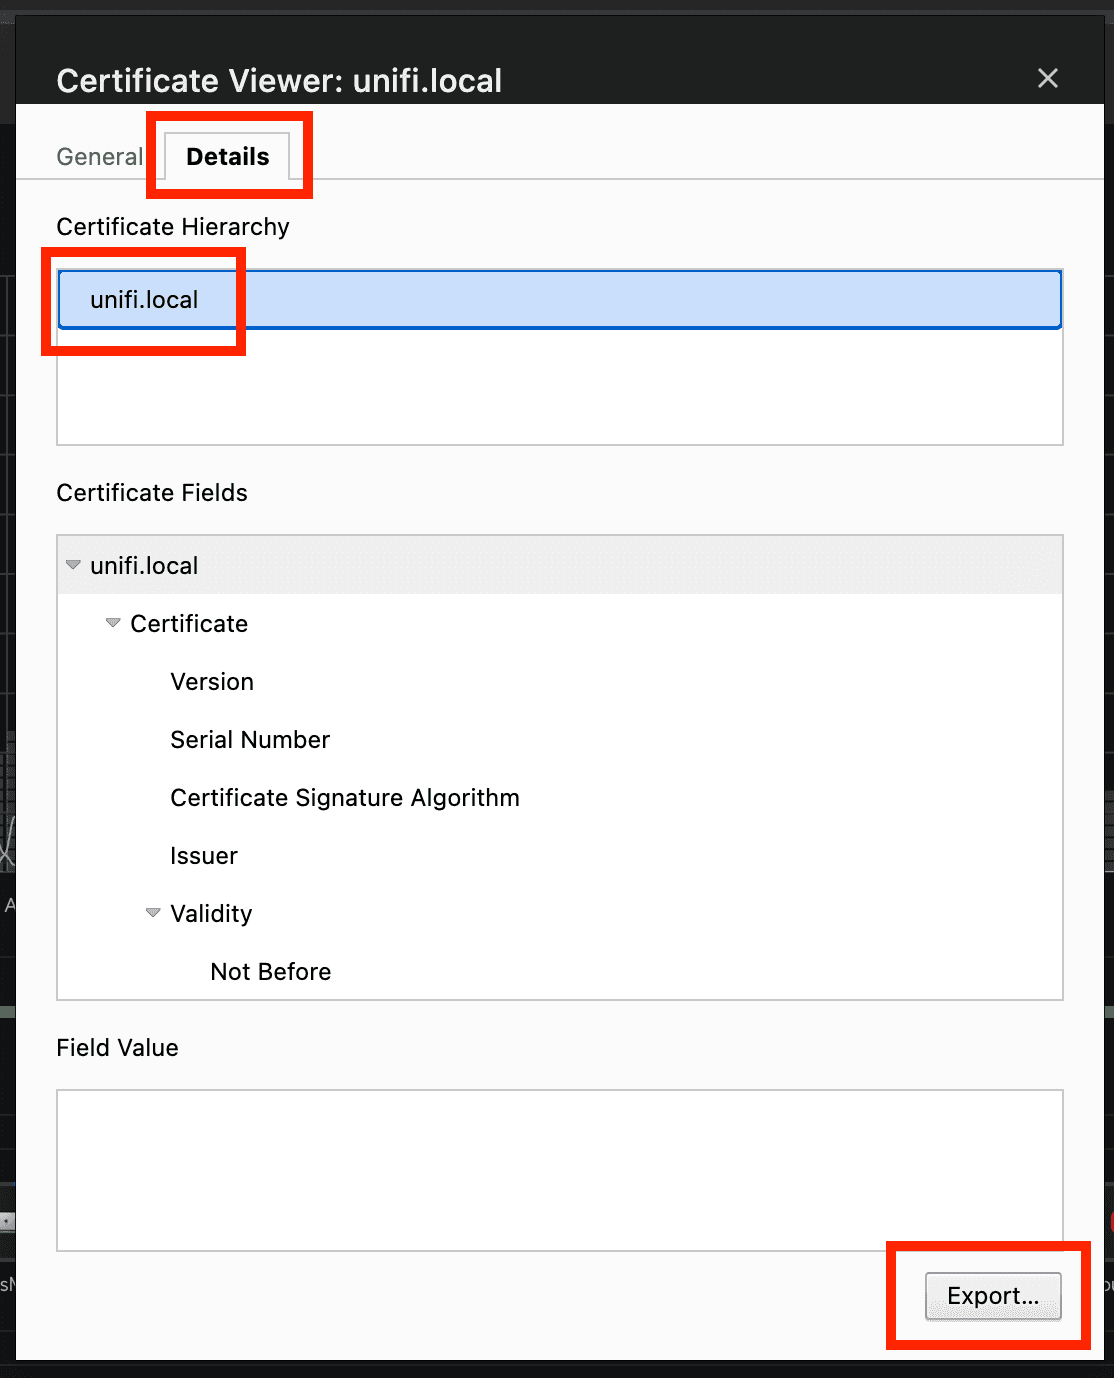
To export the certificate in Chrome:
- Navigate to your controller URL in Chrome.
- Click the lock/warning icon in the address bar.
- Export the certificate in PEM format.
Step 4: Configure in Pult
- In the Pult Dashboard, go to Settings → Presence → WiFi Settings.
- Click Add Integration and select UniFi.
- Fill in the fields:
- Controller URL --
https://<your-public-ip>:8443 - Root Certificate -- (Optional) Paste the exported certificate contents
- Username and Password -- from Step 1
- Controller URL --
- Click Save.
Pult validates the connection on save. Once connected, the integration status will show as Connected.

Last updated on Apr 20, 2026, 10:32 PM