WiFi PresenceAruba Central
Setup Guide
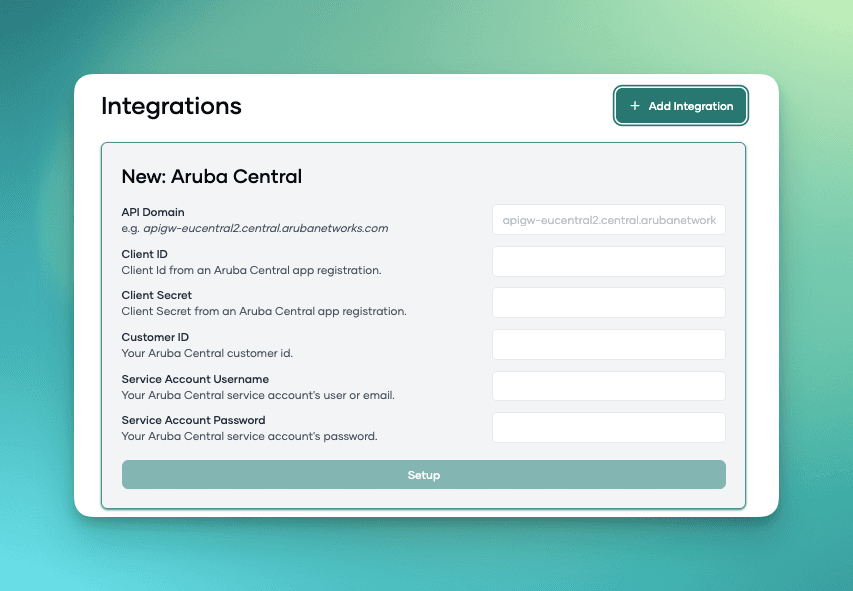
Step-by-step instructions for connecting Aruba Central to Pult Presence.
You need to create a service account in HP GreenLake and generate API credentials in Aruba Central, then enter all credentials into the Pult Dashboard.
Credentials you'll collect along the way:
| Credential | Source |
|---|---|
| API URL | Found in Aruba Central under Platform Integration → REST API |
| Customer ID | Your Aruba Central customer identifier |
| Client ID | Generated when creating the API token |
| Client Secret | Generated when creating the API token |
| Username | Service account username (HP GreenLake) |
| Password | Service account password (HP GreenLake) |
Step 1: Create a Service Account
A service account is a user with limited read-only permissions that Pult uses to access your Aruba Central data.
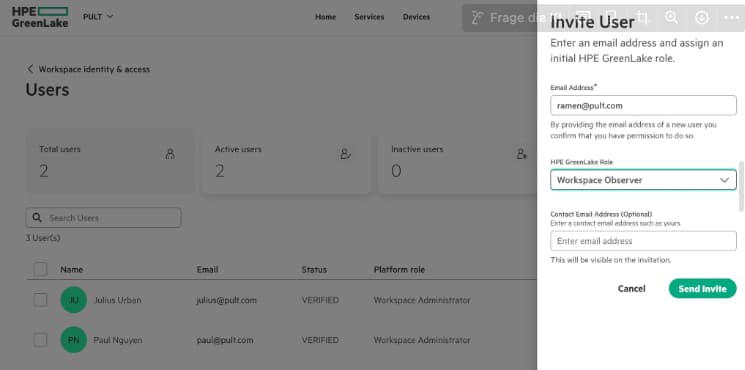
- Log in to HP GreenLake with an admin account.
- Navigate to the Users page and click Invite User.
- Enter an email address for the service account.
- Set the GreenLake role to Workspace Observer (or an equivalent read-only role).
- After the user has been activated through the invitation, assign the role Aruba Central View Only for the Aruba Central service.
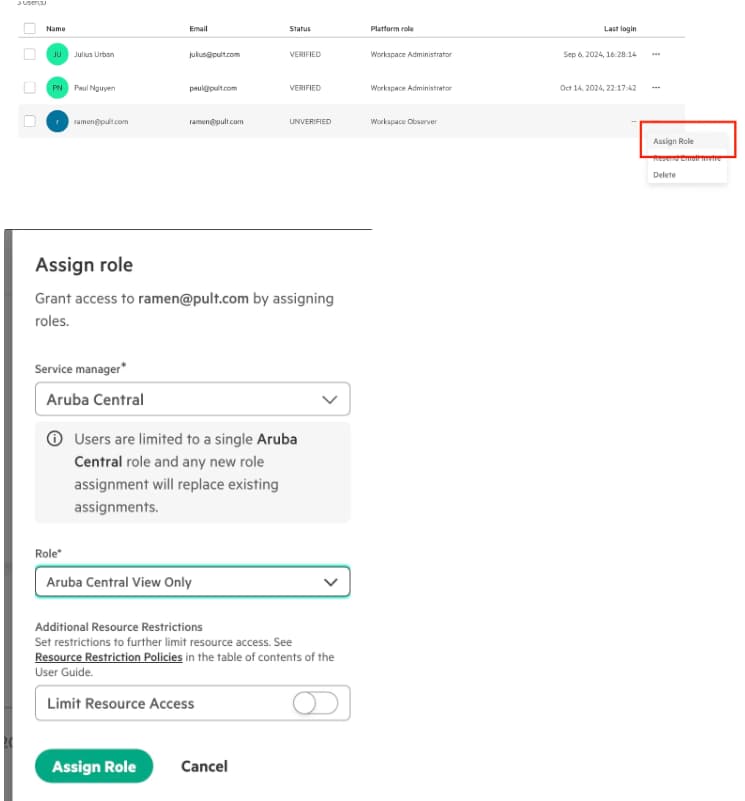
You can add resource restrictions to limit Pult's access to specific networks you designate (still read-only).
Save the username and password for the Pult configuration.
Step 2: Generate API Credentials
- Log in to Aruba Central with the service account.
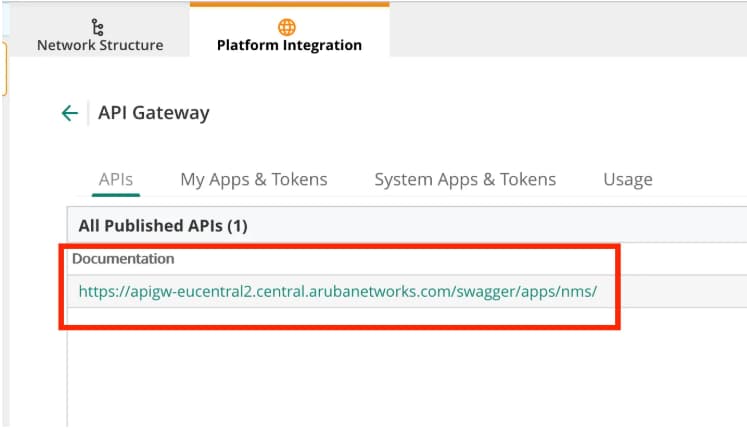
- Navigate to Global View → Maintain → Organization → Platform Integration and click REST API.
- Go to the System Apps and Tokens tab and click Add Apps & Token.
- Click Generate in the modal that appears.
- Note down the Client ID and Client Secret.
- Go back to the APIs tab and note down the API URL.
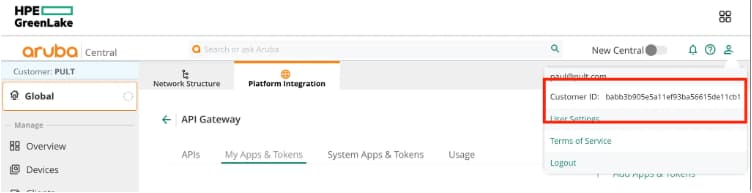
- Note down your Aruba Central Customer ID.

Step 3: Configure in Pult
- In the Pult Dashboard, go to Settings → Presence → WiFi Settings.
- Click Add Integration and select Aruba Central.
- Fill in all six fields:
- API URL -- from Step 2
- Customer ID -- from Step 2
- Client ID and Client Secret -- from Step 2
- Username and Password -- from Step 1
- Click Save.
Pult validates the credentials on save. Once connected, the integration status will show as Connected.
Last updated on Apr 20, 2026, 10:32 PM